Homemade Hamburger

I make this burger quite often so I thought it would be much easier for me to prepare some for a bloggers meet up last week. The bun and meat actually made ahead of time that sitting in the freezer until I need it. I'm so sorry to Edith as I didn't make extra for her family members. So I post up this recipe here for your reference and for any bloggers that you had tried and like it. Please feel free to make it and remember to make a big batch to freeze it so that you could have homemade hamburger in no time whenever you crave for it. Cheers!

Recipe for the patties:

  • 250g minced pork
  • 250g minced beef
  • 1 big onion, peeled and finely chopped
  • Olive oil
  • 1/4 teaspoon of cumin powder
  • 1/4 teaspoon fennel powder
  • 1/2 teaspoon coriander powder
  • some sea salt and ground black pepper
  • a handful of freshly grated parmesan cheese
  • a tablespoon Djon mustard
  • 1/2 beaten egg
  • 80g fresh wholemeal breadcrumbs

  1. Fry the onion with some olive oil in a pan for few minutes until softened. When the onion completely cool down, mix it to the meat.
  2. Add the rest of the ingredients and half of the breadcrumbs and mix well. (if the mixture is too sticky, add a few more breadcrumbs)
  3. Shape the meat into the size you like and place on a tray with greaseproof paper.
  4. Sprinkle some bread crumbs on top of each burger and press down gently. Chilled in the fridge for 3-4 hours or in the freezer if not using it immediately.
  5. Fry the burger in a little oil on medium high heat for few minutes, depending on the thickness of the meat.
To assemble the burger, spread some salted butter on the buns and grill it on a griller or pan fry for a few minutes until it slightly turn crisp.
Spread some djon mustard or mayonnaise on the bottom part of the buns and then top with some lettuce. Layer with the meat then follow by cheese kraft and freshly sliced tomato and finally the top part of the buns. Enjoy!


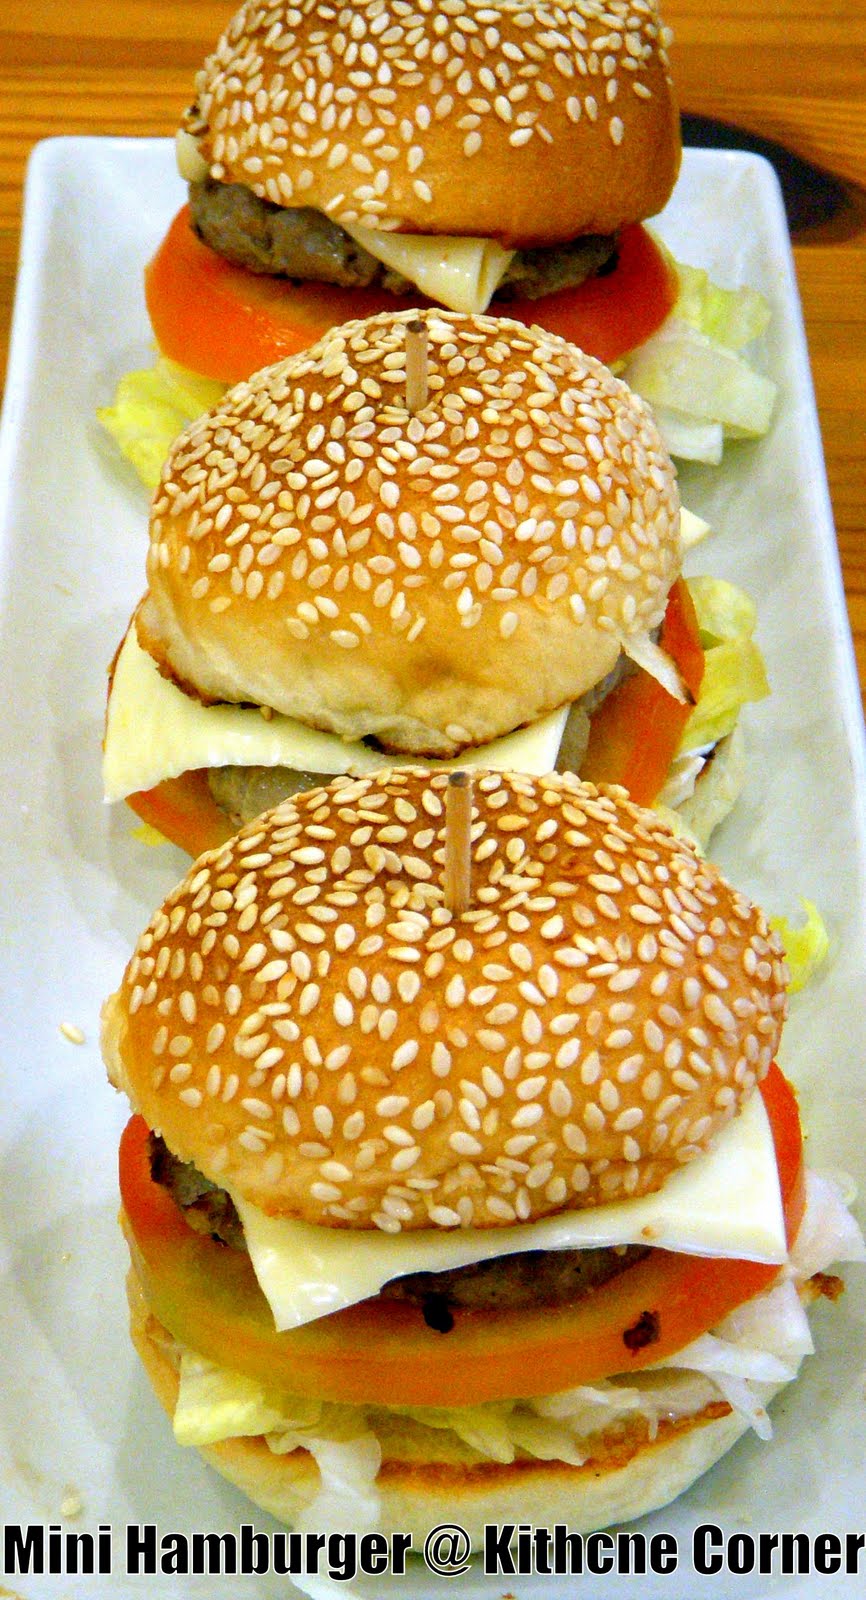
For big burgers, make it into 8 buns and 8 slices of meat or like the party mini burger 20 buns and 20 slices of patties. Some


above pictures shown are big burger in 4 inches diameter size whereas some pictures shown are small in 2 1/2 inches diameter size just like the mini burger sit on my hand. I normally make the buns first then the patties. So that the patties had got the same size with the bun and can be fixed nicely between the buns too as I hardly estimate what size of the dough will expand after proofing.


Recipe for 8 buns (approximately 60g for each dough or make more into small little buns):


210g bread flour / 56g plain flour / 20g milk powder / 42g


caster sugar / half teaspoon of salt / 6g yeast / 30g beaten eggs / 85g water / 84g water dough / 22g unsalted butter


Recipe for the water dough "water roux":

Cook 125g water with 25g bread flour at medium low heat, keep stirring until it become thicken and no lumps left. If you've a candy thermometer, measure it until the temperature turn to 65C then turn of the heat. I didn't measure it with thermometer, so I cook it until quite liquid consistency like the baby porridge. Transfer to a clean bowl to cool down.


Methods:

  • Place all the ingredients for kneading except the butter until everything come together and become a smooth dough then add in the butter a little at a time.
  • Let the dough slowly absorb the butter then turn to speed two if you are using kitchenaid mixer. Knead until the dough no more sticking at the side of the mixing bowl and the dough should be very smooth and elastic.
  • Let it proof for 40 minutes in a clean bowl cover with cling warp.
  • Divide the dough into even size of 8 portions or any size you like it to be then let it rest for 10 minutes.
  • Shape the dough into smooth round shape. Prepare some water on a a clean plate and place a kitchen towel on the top. Damp the surface of each dough and run the damp surface around a bowl of sesame seeds. Place the dough on a baking tray and let the it proof for 40 minutes. Bake at 180C for 15 minutes.

    Blueberry Bakewell Tart


    I guess it's blueberry season now as I realized there are many bloggers had posted their bakes with blueberry which had given me lots of inspiration. I didn't think much and took two punnets of fresh blueberries when I saw it in the supermarket. At first, there are many ideas came to my mind whether to make muffins, pancake, juice or crumble etc but I don't really have the appetite to eat what is in my mind so ended up I choose to make a rustic yet with country feel of bakewell tart which will top with my fresh and juicy blueberries. I like bakewell tart because the almond bring lots of flavor with the combination of butter together with the shortcrust pasty. Normally I would like to make bakewell tart with plum or apple and here I found blueberry goes well well with it too! A piece of this nutty and buttery flavor tart for an afternoon tea,  simplicity is my biggest satisfaction. 


    Recipe for 8 inches baking pan


    For the pastry:
    220g plain flour
    110g unsalted butter
    20g sugar powder
    pinch of salt
    2 egg yolks + 2 tbsp water


    For the fillings:
    95g ground almond
    27g plain flour
    1 tsp vanilla extract
    83g unsalted butter
    55g caster sugar
    1 egg
    some blueberry jam


    Method:
    1. For the pastry, add the cold water to the egg yolks and stir with a fork.

    2. Place the flour into the bowl of a food processor, followed by the cold butter, sugar powder and the salt.

    3. Turn the processor on and pulse several times until the mixture resembles fine breadcrumbs.

    4. Add two-thirds of the egg yolk/water mixture and pulse again. If the mixture is still too dry, add the remaining egg and water mixture (you may not need to use all of it). Be careful not to overwork the pastry. Stop pulsing when the mixture has the consistency of chunky breadcrumbs.

    5. Turn the pastry out onto a clean, floured work surface and, with floured hands, bring together to make a smooth dough, but don't knead.

    6. Shape into a flattened ball, wrap in cling film and refrigerate for about 10-15 minutes. You can keep the pastry at this stage for 2-3 days if not using it immediately.

    7. Remove the pastry from the fridge. On a clean, floured work surface, roll it out with a floured rolling pin until it's slightly larger than the flan ring. Using the rolling pin, lift the pastry and lay it over the flan ring.

    8. With your fingers, lightly press the pastry into the sides of the ring. Run a rolling pin over the top of the ring and pull away the excess pastry at the edges. Using your fingers, gently press the pastry up to slightly build up the height of the pastry at the edges. Prick the base of the pastry with a fork.

    9. For the fillings, blitz the butter, sugar and vanilla extract in a food processor until light and creamy.

    10. Add in the ground almond, plain flour and beaten eggs and whiz until completely mixed and smooth.

    11. Place in the fridge to firm up for at least half an hour.

    12. Spoon some blueberry jam into the pastry case then spread the almond batter over the blueberry jam.

    13. Arrange the blueberries on the surface of the almond batter, pressing them in lightly.

    14. Bake the tart in the 180'C preheated oven for about 30 minutes. Remove tarts from the oven and leave it to cool.

    Milky Square Loaf


    I've received quite a few comments from previous bread post recently. Many of them having some problems just like I do, either the dough couldn't rise to the perfect square or the texture was not right etc. I must said I'm not a perfect baker and sometimes I do have problems with my dough too especially my first year of learning bread making, it's really a struggling. I think the problems could be the room temperature, humidity, yeast and all other ingredients that cause a failure. However, we all learn from mistakes. The more you practice and the more you could figure out the solution. I've been long time didn't bake a square loaf because I was crazy about the wholesome blacky bread recently, the texture and taste is just so good for me. This milky wholemeal bread is the one I did it quite often at my earlier bread learning journey and it become my almost daily bread. As some of the bloggers had problem making it, so I decided to give this a try again since I quite miss it too! 


    I'm quite happy with the result this time, it's a square loaf and the texture is soft and light. I hope people who face the failure please don't be dishearten and give up. Do it again until you get it. I'll not shame to tell you that I've feed the bin with my failure doughs many times which I couldn't remember how many. Again, thanks for everyone dropping at my blog for leaving your words! Let's face the problem and solve it. You'll get a right bread soon!


    Recipe for the bread:

    Bread flour 270g
    Wholemeal flour 30g
    Yeast 3g (this time I used 4g for a square loaf)
    Sugar 6g
    Salt 5g
    Cold milk 240g
    Unsalted butter 12g


    Method:
    1. Mix all the dry ingredients in a kneading bowl with 240ml cool milk except butter. Knead until everything combine.

    2. Gradually add in the butter continue the kneading process until it become smooth and elastic. (the dough might have a bit wet but not sticky, you might need longer time to knead it)

    3. Shape it into a smooth round dough, cover with cling film and let it rest for 80 minutes. (This time I proof for 60 minutes)

    4. Divide the dough into 3 equal pieces and roll to form 'ball' shapes.

    5. Flatten each dough and roll out into a longish shape. Roll up the dough like a swiss-roll. Place the rolled doughs on a baking pan proof for 60 minute. (I forgot to set the time, and almost proof until 95% full of the tin about 80 minutes)

    6. Bake approximately 25 minutes or until golden brown at 190'C preheated oven. (For a square loaf I baked at 200C about 35 minutes)

    Durian Soft Cheesecake


    I know the weather has been extremely hot and it's not good to eat durian at this time but when I see some durian selling in the market, I just can't help myself to buy some for baking. So, here I made a light version of durian cheesecake that called for only a little amount of durian flesh which yield a light version of durian cheesecake. The texture is similar to Japanese cotton cheesecake, quite moist and soft. 


    One thing that I always worry on making soft cheesecake is the cake might crack on the surface and shrink terribly. This time the top still have a bit of crack but not too much. Perhaps I could still turn the heat slightly lower. As I know it's definitely going to be shrank, so what I do is to help it shrink nicely. Grease the side of the pan with butter and coated with bread flour. I find this method quite good. Although the weather is quite hot, this light and moist durian cheesecake quite a refreshing dessert. Just to make sure it's cool enough to serve.


    Recipe from Chef Alan Kok
    1 slice 7" sponge cake (I used 8")
    250g cream cheese
    3 egg yolks
    150ml fresh milk
    150g durian flesh
    3 egg whites
    60g caster sugar
    1. Preheat the oven to 180C. Line a 7" round cake tin (I used 8" , serves 9) with grease proof paper and put in a slice of prepared sponge cake (I greased the side of the pan with butter and coated with bread flour) 

    2. Beat cream cheese, egg yolks at low speed until well mixed. Add fresh milk, durian flesh and mix well.

    3. In a clean mixing bowl, whisk egg white and caster sugar at high speed until soft peak is formed. Mix in mixture (2) in 3 batches.

    4. Pour mixture onto sponge cake.

    5. Steam bake the cheesecake at 180C for 20 minutes. Reduce the heat to 140C and bake for another 1 1/2 hours.

    6. Leave cake to cool in the oven with door ajar 1 hour. Chill in the fridge for overnight. 

    Ingredients for the plain sponge cake:

    (Please follow the video clip)

    140g plain flour / 4 eggs / 30g milk / 180g sugar / 4g salt / 30g oil